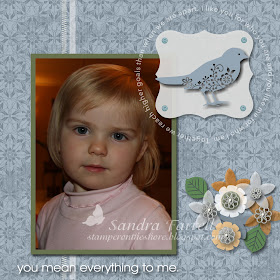
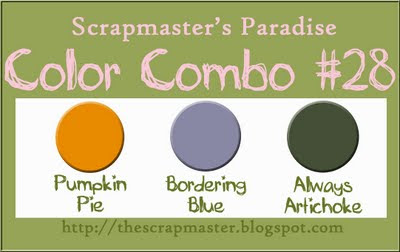
 This page was made using My Digital Studio from Stampin' Up! My Father-in-law took this awesome photo of my daughter so I just needed to scrap it. I struggled with this colour combo at first, but then I decided to focus on the colour I liked the best which was Bordering Blue. A quick look through the DSP files and I realized that there is no DSP in MDS which has Bordering Blue. So I decided to make my own.
Here's how I did it:
1. Set the background paper as Bordering Blue Cardstock - using the tools on the right side of the project screen.
2. Add the black & white DSP as a page layer using the tools on the left side of the project screen. I used Night & Day. Crop the page layer so it's just as big as the entire page.
3. Reduce the Opacity. I reduced it to 20%. Now it looks like there's Bordering Blue DSP.
After I figured out the background paper I added punches, stamps, and other embellishments to finish the page. Look at the bottom for the recipe.


The recipe:
1. Stamps (Brushes on MDS) Always, Greatest Moments, Best Wishes and More
2. Punches - 5-petal flower, Curly Label
3. Embellishments - Filigre Brads from Hodgepodge Hardware, Buttons from Button Bouquet, Whisper White Grosgrain Ribbon and White Stitching.
What a lovely picture, you did a fab job scrapping it. ?-Since you have already loaded and are using the MDS--is it user friendly and easy to install on PC? My Stampin Up person hasn't used it yet, thanks for the info.
ReplyDeleteOOPS-My email-granybg@yahoo.com
ReplyDeletesuch a cutie :D love the lil birdie accent too :)
ReplyDelete- SMK {SP Diva}
this is amazing, I would luv to see that program in action...it would be a great way to get caught up with my scrapping...tfs!
ReplyDeleteenjoy *~*
Love the look of this layout. You did a great job.
ReplyDeleteEmily-SP Diva
what a beautiful layout! love the colors and what a precious pic too! hugs!
ReplyDeleteWonderful layout and such a beautiful picture of your daughter.
ReplyDeleteMelisa-SP Diva
This turned out beautifully. I can see your work swaying a lot of people into needing that software :).
ReplyDeleteWow. That is so beautifully done!
ReplyDeleteShe is so adorable!!! Great LO - you make digital look so easy - well done!!
ReplyDeleteDeanne - SPCC {Diva}