Showing posts with label 3D. Show all posts

Thursday, June 19, 2014

Tiny 3D Camper Tutorial

When I first saw Deena Rutter's cutting files for the Scenic Route line, I knew that I wanted to turn this little camper into a 3D project.


So I've been planning this little project for a few months now.  And although I love my silhouette machine dearly, it has been a while since I last used it.  So when I sat down to create this little cutie last week, I could not find the power cord for my Silhouette.  So after a bit of tears and screaming, I pulled it together and decided to create a tutorial without a cutting machine - GASP!  I know, just a bit revolutionary in today's world right?  So how to do this without a cutting machine???  Well, it's not as difficult as you might think.  You do need a good pair of scissors though...

SUPPLIES 

- I used Deena's Scenic Route Cutting Files Vol. 1, and the Every Little Bit Daydream Paper Pack

- Adhesive - Tombo Tape and Sookwang Sticky Tape - make sure you use a strong tape

- Card Stock - Black, Grey, and Vanilla

- White printer paper

- Craft Scissors,

- Paper Cutter

- Ruler

- Pencil

DIRECTIONS:

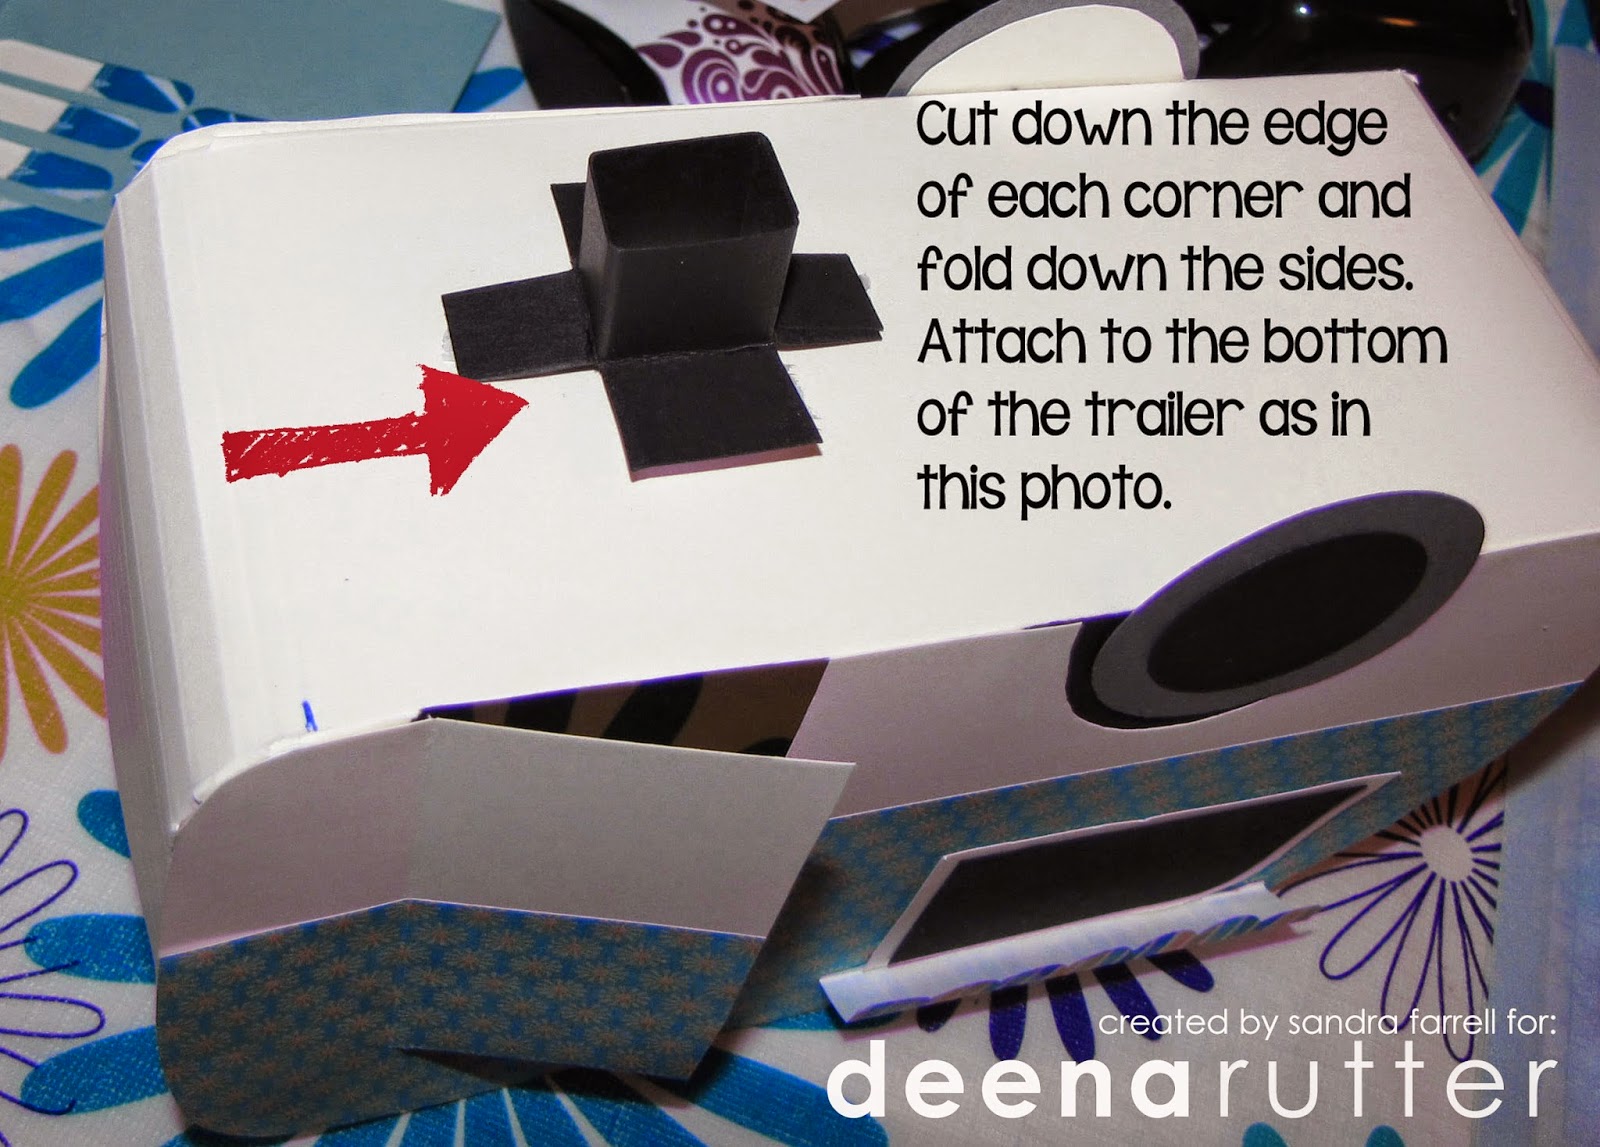
1. So the first thing I did was to take the jpeg files of this cute little camping trailer, and put them in photoshop to create a photo like below, and then I printed it out on white paper.


 2.  The rest of the directions are printed right on the photos below.


Monday, March 10, 2014

Milk Carton and Votive Tutorial


Hey there everyone. I'm excited to share my first tutorial with you today.
I decided to use Deena's new Milk Carton Gift Box Cutting File and her papers from last month's release Every Little Bit Smitten.
drutter_dcut_milkcarton_box_900previewdrutter_everylittlebit_smitten_paper_900preview
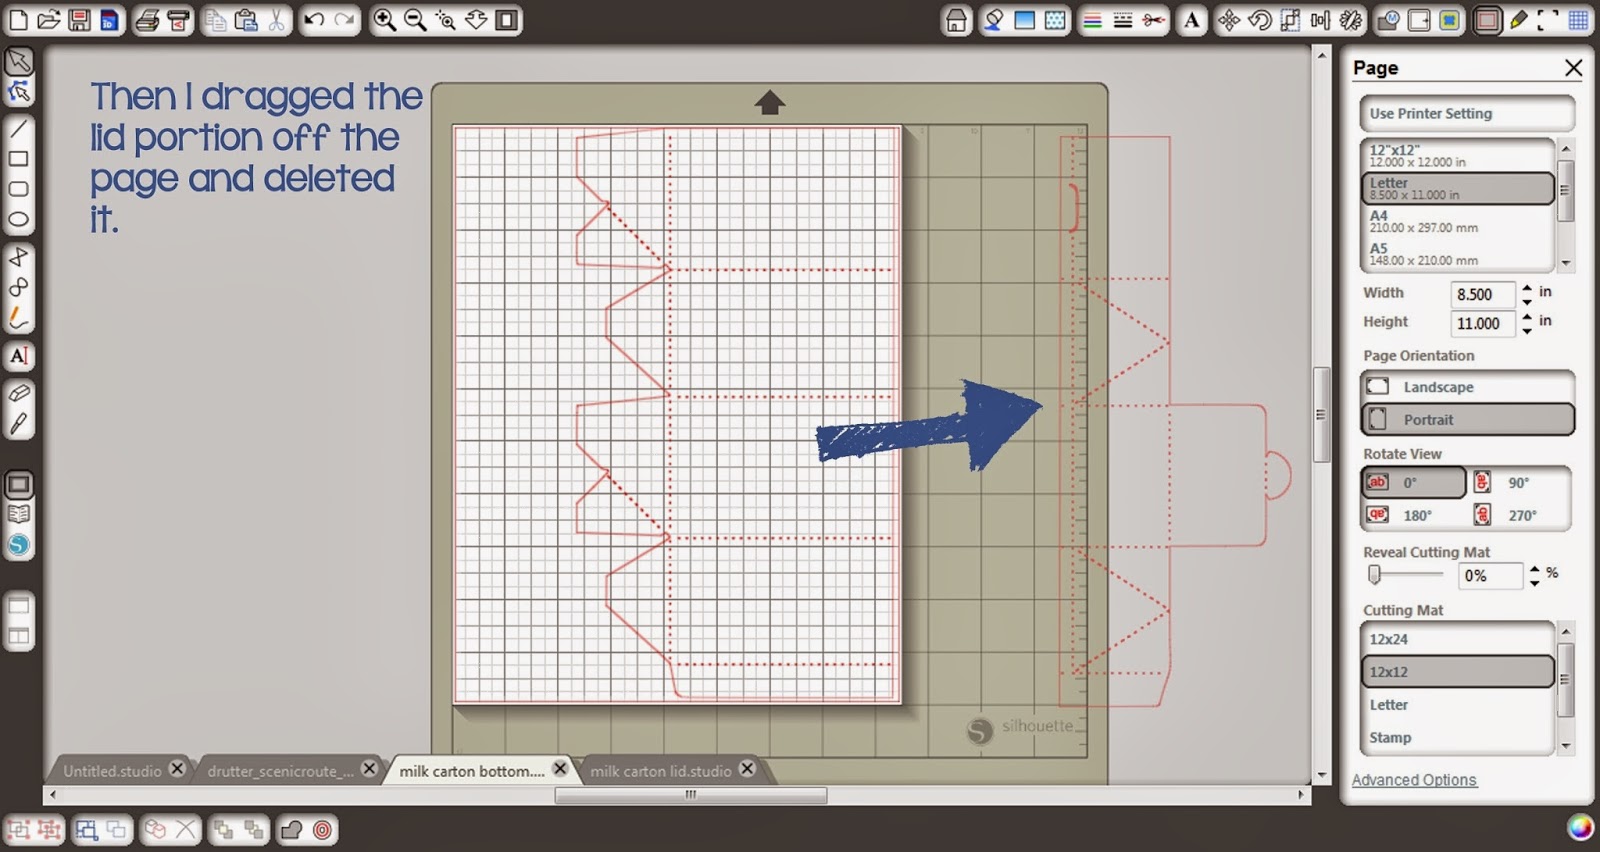
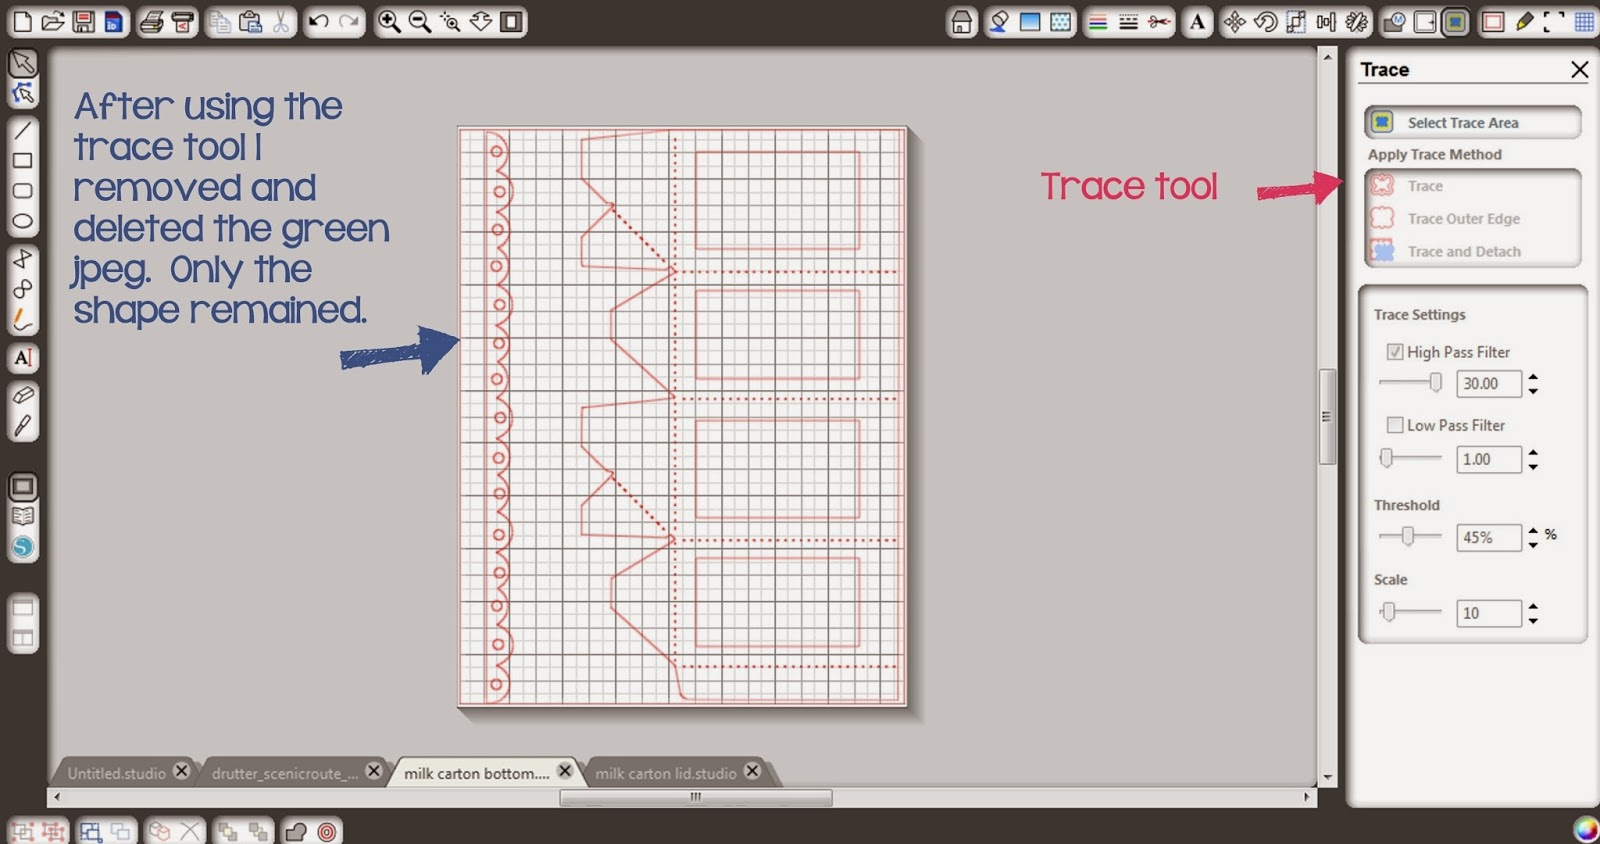
Here's a little tutorial of how I altered her cutting file to create a cute little box with a lid, and also a votive holder using Silhouette Studio.


To be honest, my printer has been acting up, so I decided to use my colour laser, which works best with regular paper, so in order to give some strength to this milk carton, I first cut it out with plain white cardstock, then I attached the printed paper to the outside of the shape and trimmed it up with a craft knife. Below are the final results.


To finish it all up I added some vellum over the 'windows' in the votive, and a nice lacey bow to the box lid.