Showing posts with label vintage. Show all posts

Friday, February 1, 2013

Princess Card


I'm sure I mentioned that I'm on a vintage kick lately.
Originally this card was inspired by this card by the
I love how she cut out the outer frame and popped it up.

 
Would you believe I used two different inks on the background of this card?
The bottom layer is Crumb Cake ink stamped on Crumb Cake paper.
The top layer is Soft Suede, stamped off, and
then stamped on Crumb Cake.

 
this card uses a variety of patterned paper from My Mind's Eye, some stickers
from the same source.  The other embellishments are from Stampin' Up!

Monday, January 21, 2013

Darling Sisters

 
This  card took me a surprisingly long time to come up with.
I wanted to try something a little bit vintage, but also wanted to add a lot of colour.
 

I added this little punch out with my butterfly punch,  I LOVE this little punch.
I sponged it from the back side to give the edges a bit more defininition.


A few more die cuts, and stickers and that cool rose ribbon from SU.
 
Anyway, I love the final result.
I hope you do too.


Saturday, January 12, 2013

Thank You Vintage

 
So I'm on a bit of a vintage kick these days.

 
I had to dust off this background stamp.
It's such and awesome stamp, and yet it really stumped me.
I stamped it with Soft Suede on Crumb Cake card stock.


I pulled a thread in the ribbon to gather it a bit.  The glitter stickers are from My Minds' Eye, and the chipboard matte is from the dollar bin at Michael's.


Friday, April 13, 2012

Twitterpated Owl


Is this not the cutest little owl????  Notice anything???


How ' bout a closer look.


Figured it out yet???

scroll down....

...

...

...


Got it now???? 

Isn't this clever??

Here's how it works.  
First - punch out the owl shape and the little vest from cardstock and DSP.
Next stamp sentiment on white cardstock
Punch out with Modern Label punch
Use Square punch to punch out the end to create a ribbon shape.
Punch two holes out with Paper Piercing Tool.


Next, make earrings. 
You will need earring posts from a jewelry store.
Twitterpated buttons from the Occasions Mini.
and Pearls Basic Jewels from the IB&C.

They are so simple. 
Use glue dots to attach together.


Once you have them assembled, poke them through the holes in the ow.
and...
...
...
VOILA!!!
Cute eh??

Sunday, March 25, 2012

Leadership Display Samples - Take TWENTY!


Well it's official - Seven years ago today I got married in Mexico.  It seems fitting to post up this leadership display page seeing as it has a photo from that memorable day.  You can't tell from the photo, but Brad and I were both really sick with the flu (not the mexican flu - just the flu).  We both had really high fevers, and most of that day I was concentrating on staying on my feet and not fainting.

I know that this page actually was on display at Leadership.  I really like this page.  The cardstock was stamped tone on tone with matching ink to make an interesting and subtle background.  This DSP is from the Occasions mini, and it's my favourite  I found the letters for the banner in all of the stamps from this set.  I stamped several copies of each word in Island Indigo on Whisper White Cardstock.  Then I coloured around the letters with Island indigo so that the letters really stood out in White.  I then punched them out with the 1/2" circle punch and popped them up on dimensionals.  The banner flags are punched out from a 1" narrow stip of paper using the pennant punch.  This made for really small flags which made the title the perfect size.  The "Love" sentiment was stamped on Blushing Bride with Riding Hood Red.  I then coloured in the letters with my Signo White Gell Pen.  I punched it out using the sizzlits label die for the big shot.  I then mounted it on a piece of Riding Hood Red and carefully cut it out so that It made a nice matte.

Thursday, March 1, 2012

Stampin' Up Facebook Project


I'm so proud to show off my latest creation for the Stampin Up Facebook Page.  This card was made to showcase various products from the current Occasions Mini Catalogue. 


If you scroll to the bottom you will find a list of ingredients. 


Here is a few closeups of the bow


Paper
125406 – Twitterpated Designer Series Paper
122925 – Calypso Coral Smooth Card Stock
119795 – Pear Pizzazz Smooth Card Stock
101650 – Very Vanilla Smooth Card Stock
100730 – Whisper White Smooth Card Stock
Ink
119670 – Early Espresso Classic Stampin’ Pad
122939 – Calypso Coral Classic Stampin’ Pad
Stamps
125487 – Rue Des Fleurs
Accessories
125592 - Paper Doily Sizzlits Die
125598 – Labels Collection Framelits Dies
125568 – Pear Pizz 3/8” Pleated Satin Ribbon
127279 – Everyday Enchantment Ribbon and Brad Pack

Saturday, February 25, 2012

Case'ing by the Sea


So I've finally had a few moments to sit down  and do some stamping this weekend  Although this card, is actually a hybrid card so there wasn't a lot of stamping done.  The Tea Shoppe set is available as a digital download, so I printed the tea cups off as a jpeg from My Digital Studio.  I also copied this card from the wonderfully talented Kimberly Van Diepen.  Click here for her card.    I basically changed up the colours and changed a few little details to come up with my own version of her card.


 Above is a close up of the tea cups.  I carefully cut them out by hand.  The ribbon is the new Pool Party Seam Binding Ribbon.


First I cut out the doily with the Big Shot from Whisper White card stock.  Then I sponged the doily with Crumb Cake and Soft Suede ink to give it an aged look.  


 In the above photo you can see the gathered ribbon.  I layered it on top of Whisper White card stock punched out with the Dotted Scallop border punch. 

 
The DSP is from the Twitterpated suite in the new Occasions Mini, as is the gathered ribbon, and the Pool Party Seam Binding Ribbon.

Friday, February 24, 2012

Leadership Display Samples - Take FIFTEEN


I have to admit.  I cased this card from the very talented Dawn McVey.  She does amazing stuff that lady.  Anyway,  I used the fabullous Sale-a-bration set "Outlined Occasions" for this card.  The squares were punched out of DSP with the postage stamp punch.  The squares were attached with adhesive and then I used the Paper Piercer and the Mat Pack to punch the little holes which I then threaded with plain thread to give it a stiched look.

The sentiments are both from the same stamp set.  I stamped the main one in Early Espresso and coloured in the images with markers.  Then I punched it out with the Modern Label punch and mounted it on the Early Espresso paper.  Next I carefully cut around it to create a matte.

Saturday, October 1, 2011

Colour Challenge with Create with Connie and Mary

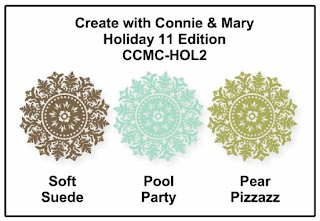
 Well here's a colour combo that I knew I had to try.  This week at Create with Connie and Mary we have an awesome colour challenge.  I was in a bit of a craze with Greeting Card Kids a few weeks ago, so I whipped up this card to go along with this challenge.  I really like how these non-traditional Christmas Colours make for a cute Christmas Card.  The image was stamped with Staz-On on watercolouring paper and then coloured in using an Aquapainter and the various ink pads.  I got the idea for the ruffled circle border from my good friend Jenn Picard.  Check out her original.

Sunday, February 27, 2011

Vancouver Regionals

Yesterday I had a fabulous time at Vancouver Regionals.  How would you like to spend a day stamping and crafting with 400 friends and the goddess herself, Shelli Gardner???  I had so much fun connecting with stamping friends from my downline groups, and with some I have met through this blog.  I missed meeting up with some of you, I hope you had fun, it was so hard to find people in that large conference room.
 
 
Above is one of the Make-n-takes we did.  Of course, with all the activitiy in the room, I did not actually finish this project until I got home last night.  It's a banner made with the Petal Cone die!!!!   AND, I was sooooooooooooo excited when I saw it as I knew it would be perfect for my current craft room and I'll have to make an even bigger one for my new craft room when we move to the new house in 2 months!!
I have so many ideas to share with you in the next few days.  I can't wait!!!!
But here's the detail for today's project.
The Recipe:
1,  Paper - Cherry Cobbler, Early Espresso, Naturals Ivory, Marina Mist, Old Olive cardstock.  Botanical Gazette DSP Patterned paper.
2.  Ink - Cherry Cobbler, Early Espresso, Not Quite Navy, Old Olive
3.  Tools - Sstampin Dimensionals, Glue Pen, Glue Dots, SNAIL, Bone Folder, Colour Spritzer Tool, Dotted Scallop Ribbon Punch, Itty Bitty shapes Punch, Petal Cone Biz die and Fun Flowers Bigs Die and Big Shot, sponge daubers
4.  Accessories - Dazzling Diamonds glitter, Pear Pizzazz Seam Binding, 5/8 Crochet Trim, Linen Thread, Brights Designer Buttons, Pearl Basic Jewels, Trinket Keys, Vintage Trinkets

Friday, February 11, 2011

Always Elegant

I pulled out my new, free, saleabration set, Always Elegant, and my Big shot to make these cards.  I'm actually really proud of myself, becasue I tried and tried and tried and FINALLY mastered the folded ribbon - at least close enough for me.  I just could not get it, and even the green one is a bit crooked, but I think I'm happy with them now.  To honour that, I decided to make a card (or two) with a vintage feel.  And then I saw that Pals Paper Arts was having a vintage theme this week.  Perfect timing!!!  So to make these cards you will need the Big Shot, the new Fun Flowers Bigz die, the Framed Tulip embossing folder, and the Beatufiul Wings Embosslit.  I also used my modern label punch.  The background is Crumb Cake cardstock run through the big shot and then trimmed and sponged with Crumb Cake ink around the edges to bring out the embossing.  The ribbons are Seam Biding ribbon,.  I ran a strip of sticky tape where I wanted the ribbon and then attached a bit of ribbon, then turned the card and did it again, then turned the card back and did it again...  The flower is Whisper White cardstock, run through with the Fun Flowers die.  I then took the middle sized flower and stamped the flourish image from the Always Elegant set in Crumb Cake Ink.  It took three times to cover the whole flower.  Then all of the flowers were sponged with Crumb Cake.  Next I punched a hold through the entire thing and popped a bit of seam binding ribbon through it to secure it.  I also added a bit of snail so that it was really secure.   Then I played with the edges, I rolled them, and bent them so that the flower no longer lay flat.  I put a few stampin dimensionals on the outer edges and some sticky tape in the middle so when it was secured to the card front, it was a bit raised up.  The mini butterflies were made with the Beautiful Wings embosslit and then attached with glue dots.  The sentiment was stamped on a scrap of whisper white and then punched out with the modern label punch and then attached with glue dots.

Wednesday, January 26, 2011

Stampin Royalty Challenge #56

     Well this week we have a sketch challenge at Stampin' Royalty, designed by yours truly.  I seem to be on a Valentine's Day kick right now - must be because of the fabulous Occasions Mini we have going on.  Anyway  the heart is framed with the Tulip Frame Textured Impressions Folder.  I found a tutorial on this somewhere on the web and can't figure out where from.  Once I figure it out I'll post up the link for you.  It's really easy.  The only problem for me is that once I sanded it down to do the texture, it started to look uneven.  I'll have to try again seeing as I'm teaching a tutorial on this to a group of Demonstrators this weekend. 
     The sentiment comes from the 'Be My Valentine' single stamp from the current Occasions Mini.  I stamped it on some DSP and carefully cut it out and popped it up on dimensionals.  The heart and flowers were also stamped on DSP and punched out with their coordinating punches - love that Punch Potpourri set.  I then mounted the heart on some Cherry Cobbler cardstock and cut it out to matte it.  Then I used the distressing kit to rough up the edges and add some colour texture.  I really like how this hides my uneven cutting.  The Flowers were stamped on Cherry Cobbler and punched out.  Then I turned them a bit and mounted the vanilla flowers over top.   
The Fun Stuff:
1.  Paper - Botanical Gardens DSP, Early Espresso, Cherry Cobbler cardstock
2   Ink - Cherry Cobbler, Early Espresso
3.  Stamps - Be My Valentine, Punch Potpourri
4.  Punches - Large Heart, Boho Blossoms, Scallop Trim Border
5.  Accessories - Small Pears, Tulip Frame Textured Impressions Folder, Distressing Kit

Tuesday, January 25, 2011

CAS Valentine

     This card was my swap for my Upline's meeting last night.  I was thrilled to get together with many members of Stampin' Royalty's Design team.  Last night we had past members Shanda, Sarah, and Sabriena, as well as current DT members Marlene, Jenn, and Angela.  There was lots of talking, laughing, swapping, and make'n takes. 
     So this was a clean and simple swap that I put together.  The card was stamped with Fine Flourish in Blushing Bride.  I then masked it out and sprayed Smooch Spritz on it.  It's hard to tell in the photo but it looks great in real life.  The Heart was made with the Scalloped Heart of Hearts Embosslit and Real Red cardstock.  I then stamped the sentiment from the 'Be My Valentine' stamp from the new Occasions Mini.  Then I cut it out and popped it up on dimensionals.
   After checking out Stampin' Up Only Challenges, I saw they have a Valentine's Day Challenge this week.  So I thought I'd enter that.

Wednesday, December 22, 2010

Stampin Royalty Challenge #51


It's Wednesday which means we have another challenge over at Stampin' Royalty. This week it's a sketch challenge. I couldn't wait to pull out some new product from the upcoming Occasions Mini and Saleabration 2011. I just loooooove this new Create a Cupcake punch and stamp set. and the Botanical Gazette paper is simply fabulous. I flipped the sketch to get a mirrored image.

The Fun Stuff1. Paper – Botanical Gazette DSP, Whisper White, Crumb Cake
2. Stamps – Create a Cupcake, Punch Bunch,
3. Ink – Early Espresso, Cherry Cobbler, Crumb Cake
4. Accessories – Build a Cupcake Punch, Cherry Cobbler Seam Binding Ribbon, Stampin’ Dimensionals, Word Window and Modern Label punches, Scallop circle and 1 3/8” circle punches.

Sunday, December 12, 2010

Thanks for Mojo

I finally had time to sit down and play with my new toys from Stampin' Up! I decided to try them out on the latest Mojo Monday sketch. I took my new Botanical Gazette patterned paper and ran it through the big shot with the latest Framed Tulips textured impressions embossing folder. Next I sanded it down to reveal the white inner of the paper. Then I used my distressing tools to rough up the edges. I trimmed down another page of the same patterned paper and stamped it with the Thanks sentiment and then sponged the edges with Early Espresso. The ribbon is the new Seam Binding Ribbon in Crumb Cake, and the leaves were punched out of Old Olive cardstock with the two step bird punch. The flower was made using the new Build a Blossom stamp set and Blossom Petals Punch. I sponged the edges of the flowers for more dimension. Finally I added a few Basic Pearls to finish off the sketch. This card was really fun to make.

The Fun Stuff:1. Paper – Botanical Gazette DSP, Whisper White and Early Espresso cardstock
2. Stamps – Build a Blossom, Thank You Kindly
3. Ink – So Saffron, Not Quite Navy, Early Espresso
4. Accessories – Framed Tulips Textured Impressions Embossing Folder for the Big Shot, Sanding Block, Crumb Cake Seam Binding Ribbon, Blossom Petals Punch, Basic Pearls Jewels, Stampin’ Dimensionals

Wednesday, July 14, 2010

Stampin Royalty Challenge #28

Well it's Wednesday and that means another challenge over at Stampin' Royalty. This week the challenge is stenciling. Check out Stampin' Royalty to see the Goddess' samples. Hop on over to Jody's blog to start the weekly blog hop.


For this card I tried to follow the vintage trend which is so popular these days. I made a stencil using the small heart punch. I was inspired by a card on page 202 of the current Stampin' Up Idea Book and Catalogue. Click here for a tutorial on how I did this. Once I had stenciled the hearts on pink cardstock I roughed up the edges and curled the ends to give it a worn look. Once I had this strip I needed to provide an equally vintage background. First I pulled out some Crumb Cake (kraft) cardstock and embossed it. Next I ripped the edges using the Tearing Edge ruler. I decided to mount it on Pink Pirouette cardstock like the hearts. I stamped an image from the Tiny Tags stamp set in Pretty In Pink to add more contrast. I wapped this with ribbon and twine. Next I stamped the sentiments with the Tiny Tags set and punched them out. I put a small hole in the top of each tag and threaded them with twine. I gathered all the twine and clipped them to the heart strip using a library clip. Finally, I decided to add the flowers from Vintage Vogue. I cut them out and roughed up the edges for a more vintage look. I wanted to use a Filigree Brad for the centre, but I was out of them, so I pulled out my retired corduroy buttons and used a Chocolate Chip one for the flower's centre. Finally the entire thing was mounted on Rich Razz cardstock.

The Fun Stuff:
1. Ink – Pretty In Pink, Pink Pirouette, Rich Razzleberry
2. Paper – Cardstock – Whisper White, Pretty In Pink, Pink Pirouette, Rich Razzleberry
3. Stamps – Vintage Vogue, Tiny Tags
4. Accessories –Stampin’ Dimensionals, Clips Assortment, Linen Thread, Rich Razzleberry Grosgrain, Tiny Tags punch, Corduroy Buttons

Saturday, March 20, 2010

Swaps on Saturday

I received this card from a swap a few months ago. You can't tell from the picture, but she's sprayed it with shimmer mist, so it's all sparkly. It was made by Trina St. Michael.

Monday, February 8, 2010

SPCC #34


This card was whipped up in a matter of minutes. The roses were imprinted in the Manhattan Flowers Texutred Impressions folder exclusive of Stampin' Up! The stampset (Vintage Labels) coordinates nicely with several punches and it's available free in the current Sale-a-bration catalogue.
The Fun Stuff:
1. Paper - Rich Razzleberry, Very Vanilla
2. Stamps - Vintage Labels
3. Ink - Bermuda Bay, Soft Suede
4. Punches - Scallop Circle, 1 3/4" Circle
5. Accessories - Rich Razzleberry 1/2" Polka Dot Grosgrain, Stampin Dimensionals, Silver Brads

Wednesday, January 27, 2010

Stampin Royalty Challenge #4

Here's another challenge from Stampin' Royalty and this week we had a fun sketch challenge. I made two cards for this sketch and I had a hard time choosing one for the Stampin' Royalty Webpage. The top card was put up there, but scroll down to find the other one I created.

1. Stamps - Vintage Vogue
2. Ink - Old Olive, Rich Razzleberry
3. Paper - Cottage Wall DSP, RIch Razzleberry, Old Olive, Orchid Opulence, Whisper White
4. Accessories - Old Olive 1/4" grosgrain, Rich Razzleberry 1/2" Polka Dot Grosgrain, Scallop Trim Border Punch

Tuesday, January 26, 2010

Vintage Fun

I'm having sooo much fun with the new Vintage Vogue stamp set and with the new papers in the Sweet Pea DSP. Both items are available in the new Occasions Mini.

The Fun Stuff:1. Paper - Sweet Pea DSP, Pretty in Pink, Rose Red, Old Olive, Chocolate Chip, Very Vanilla cardstock
2. Ink - Old Olive, Rose Red, Real Rose, Pretty in Pink
3. Stamps - Vintage Vogue, Teeny Tiny Wishes
4. Accessories - Old Olive Brads, Stampin Dimensionals, Masterpiece Ribbon Originals